Entity Framework ile ASP.NET Core Web API CRUD İşlemleri

Hi! I'm Gulsun. I'm a computer engineer. I like developing. I like to improve myself and innovate. I enjoy sharing what I know. Welcome
Herkese merhaba, bu yazımda küçük bir API oluşturarak CRUD işlemlerini birlikte yazacağız. Haydi gelin başlayalım.
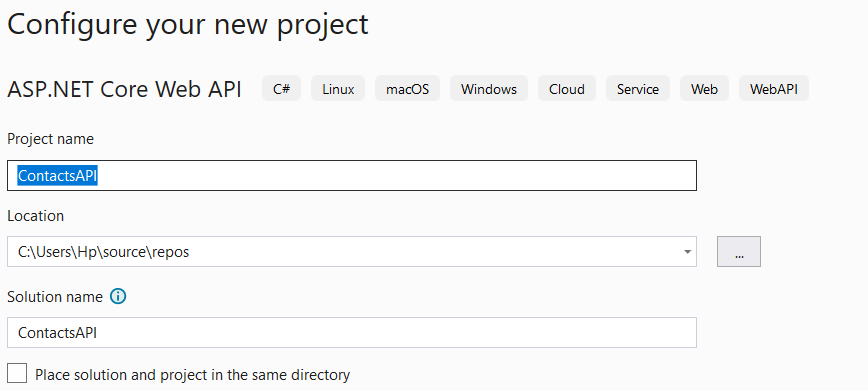
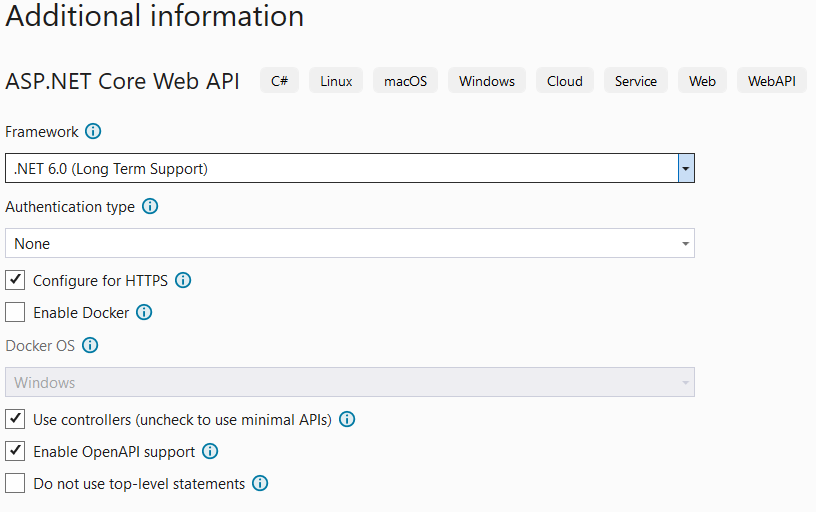
1- Visiul Studio 2022'yi kullanarak yeni bir ASP.NET Core Web API projesi oluşturuyoruz. Projenin ismini ContactsAPI yapıyoruz. .Net 6.0 seçtikten sonra yeni proje oluşturma işlemi tamamlanmış oluyor.

2- NuGet Package Manager’dan
“Microsoft.EntityFrameworkCore.InMemory”, “Microsoft.EntityFrameworkCore.SqlServer”,
“**Microsoft.EntityFrameworkCore.Tools”**,
“Microsoft.EntityFrameworkCore”
paketlerini indiriyoruz.
3- Projeye sağ tıklayıp Models isminde bir klasör oluşturuyoruz. Klasörün içine Contact adında bir class ekleyerek propertyleri yazıyoruz.
using System.ComponentModel.DataAnnotations;
using System.ComponentModel.DataAnnotations.Schema;
using System.Text.Json.Serialization;

namespace ContactsAPI.Models
{
 public class Contact
 {
  [Key]
  public int Id { get; set; }
  public string FullName { get; set; } //Property
  public string Email { get; set; }
  public long Phone { get; set; }
  public string Address { get; set; }

 }
}
4- Daha sonra projeye sağ tıklayıp Data isminde bir klasör oluşturuyoruz. Bu klasörün içine “ContactsAPIDbContext” isminde bir class oluşturuyoruz.
using ContactsAPI.Models;
using Microsoft.EntityFrameworkCore;

namespace ContactsAPI.Data
{
 public class ContactsAPIDbContext:DbContext //DbContext'ten miras alıyor
 {
        public ContactsAPIDbContext(DbContextOptions options):base(options)
        {
            //options ile bağlantı dizesi alınmış olacak
        }
        public DbSet<Contact> Contacts { get; set; } //Tablo

 }
}
5- appsettings.json dosyasına database bağlantısı için “ConnectionStrings” eklemesini yapıyoruz.
"ConnectionStrings": { //bağlantı dizesi
    "DefaultConnection": "Server=(localdb)\\ProjectModels;database=ContactsDatabase; integrated security=true; Trusted_Connection=True;MultipleActiveResultSets=true"
6- Aynı zamanda program.cs dosyasına aşağıdaki kod parçasını ekliyoruz.
//Yapılandırma,register işlemi yapıldı
builder.Services.AddDbContext<ContactsAPIDbContext>(
 options => options.UseSqlServer(builder.Configuration.GetConnectionString("DefaultConnection"))); //bağlantı dizesi
7- Update ve Create işlemlerinde id’nin gözükmemesi gerekdiği için Models klasörü altında iki ayrı sınıf oluşturuyoruz ve gerekli propertyleri ekliyoruz.
namespace ContactsAPI.Models
{
 public class AddContactContextRequest
 {
  //Id sırayla kendi kendine geldiği için ıd'yi ekleme yaparken gizlememiz gerekir
  public string FullName { get; set; }
  public string Email { get; set; }
  public long Phone { get; set; }
  public string Address { get; set; }
 }
}
namespace ContactsAPI.Models
{
 public class UpdateContactContextRequest
 {
  //Id sırayla kendi kendine geldiği için ıd'yi güncelleme yaparken gizlememiz gerekir
  public string FullName { get; set; }
  public string Email { get; set; }
  public long Phone { get; set; }
  public string Address { get; set; }
 }
}
8- Bütün bu işlemlerden sonra yapmamız gereken artık migration işlemlerine geçiş yapmaktır. İlk olarak Package manager console’a aşağıdaki komutları sırayla yazıyoruz ve tablomuzu database’e yansıtmış oluyoruz.
PM> add-migration init
PM> update-database
9- Bu aşamada Controllers klasörünün içine Contacts isminde Controller oluşturuyoruz. Daha sonra ContactsAPIDbContext’in implementasyonu yerleşik olarak yapıyoruz ve constructor ile değer veriyoruz. Bu işleme Dependency Injection denilir.
using ContactsAPI.Data;
using ContactsAPI.Models;
using Microsoft.AspNetCore.Http;
using Microsoft.AspNetCore.Mvc;
using Microsoft.EntityFrameworkCore;

namespace ContactsAPI.Controllers
{
 [Route("api/[controller]/[action]")]
 [ApiController]
 public class ContactsController : ControllerBase
 {

  // Dependency Injection

  private readonly ContactsAPIDbContext _dbContext;  // ContactsAPIDbContext'in implementasyonu yerleşik olarak yapıldı

  // Bir readonly'nin değerini iki yerde verebilirsiniz ilki constructor, diğeri tanımlandığı yerdir.
  // Ayrıca readonly ifadeler bir kez set edilebilir
  public ContactsController(ContactsAPIDbContext dbContext) // Constructor
  {
   _dbContext = dbContext;
  }
 }
}
Artık endpointlerimizi yazmaya başlayabiliriz.
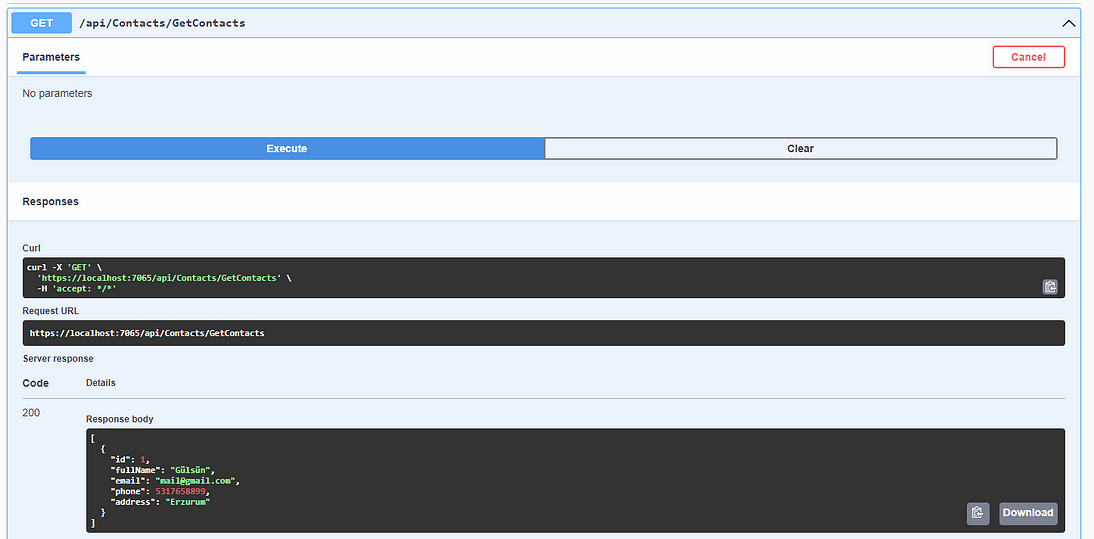
1- İlk olarak kişileri listelemek için bir HttpGet isteği oluşturuyoruz.
  [HttpGet]
  public async Task<IActionResult> GetContacts() //Listeleme yapar
  {
   return Ok(await _dbContext.Contacts.ToListAsync());
  }
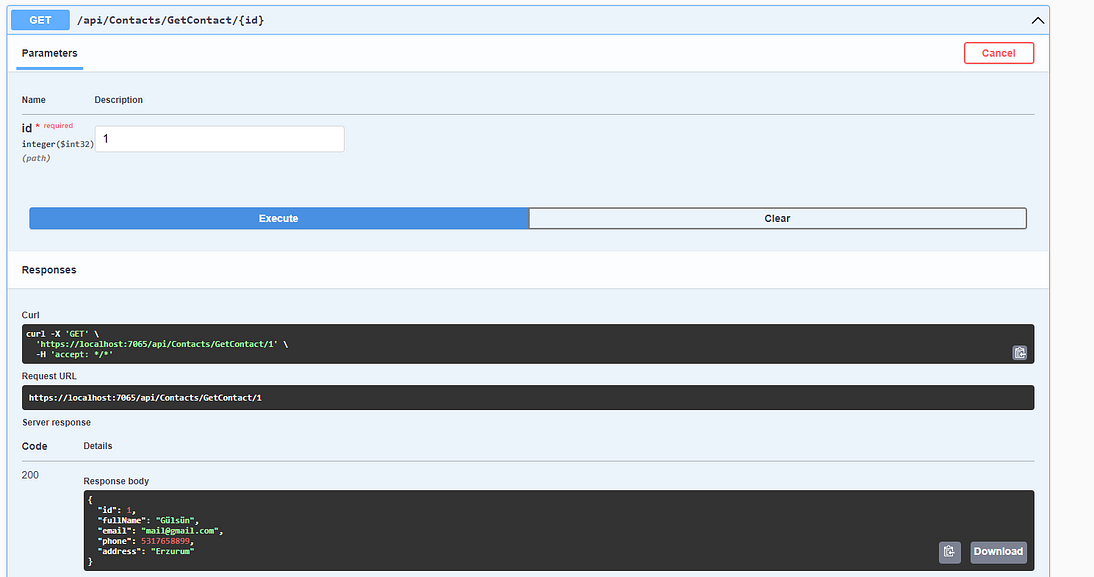
2- Daha sonra istediğimiz bir id’deki kişinin listelenmesi için tekrar HttpGet isteği oluşturuyoruz.
  [HttpGet("{id}")]
  public async Task<IActionResult> GetContact( [FromRoute]int id) //id'si verilen kişiyi listeleme
  {
   var contact = await _dbContext.Contacts.FindAsync(id);
   if (contact == null)
   {
    return NotFound();
   }

   return Ok(contact);
  }
3- Şimdide kişi ekleme işlemi yapıyoruz. Bunun için HttpPost isteği oluşturuyoruz.
  [HttpPost]
  public async Task<IActionResult> AddContact([FromBody] AddContactContextRequest addContextRequest)  //ekleme
  {
   var contact = new Contact()
   {

    Address = addContextRequest.Address,
    Email = addContextRequest.Email,
    FullName = addContextRequest.FullName,
    Phone = addContextRequest.Phone
   };
   await _dbContext.Contacts.AddAsync(contact);
   await _dbContext.SaveChangesAsync();

   return Ok(contact);
  }
4- Kişi ekleme işlemini de tamamladığımıza göre artık id’ye göre kişi güncelleme işlemine geçiş yapabiliriz.
  [HttpPut("{id}")]

  public async Task<IActionResult> UpdateContact(int id, UpdateContactContextRequest updateContextRequest) //id'ye göre güncelleme
  {
   var contact = await _dbContext.Contacts.FindAsync(id);

   if (contact != null)
   {

    contact.Address = updateContextRequest.Address;
    contact.Email = updateContextRequest.Email;
    contact.FullName = updateContextRequest.FullName;
    contact.Phone = updateContextRequest.Phone;


    await _dbContext.SaveChangesAsync();
    return Ok(contact);
   }

   return NotFound();
  }
5- Artık son endpoint’imiz olan kişi silme işlemine geçip yapıp id’ye göre kişi silebiliriz.
  [HttpDelete("{id}")]
  public async Task<IActionResult> DeleteContact(int id) //id'ye göre silme
  {
   var contact = await _dbContext.Contacts.FindAsync(id);

   if (contact != null)
   {

    _dbContext.Remove(contact);
    await _dbContext.SaveChangesAsync();
    return Ok(contact);
   }

   return NotFound();
  }
Artık kişi ekleme, listeleme, güncelleme ve silme özelliklerine sahip bir mini API oluşturmuş olduk. Benim bu kaynakta anlatmak istediklerim bu kadardı umarım faydalı olmuştur. Sonraki yazımda görüşmek üzere.
Mutlu kalın, mutlu kodlayın 🚀
Proje GitHub linki: ContactAPI


